Glo BIS appear to be the only BIS (Blackberry Internet
Service) that was working in Nigeria apart from Airtel which data consumption
rate is very high with other device apart from
Blackberry Phones. But some time ago it was stopped from
working with other device. It service charges goes for 1000 naira and you are
given 3gigabyte of Data.
Until recently some discovery was made that this glo BIS can
still work with android and in turn share with other device either through USB tethering
or Wi-Fi tethering.
Requirement
1. Rooted android
Phone
2. Blackberry IMEI
3. USB Cable
Steps
1.
Rooting your android Phone; in rooting your
android you will need a Usb cable with which you will connect the phone to a
laptop (ensure to enable USB debugging on the android) you will need the
software kingoroot, download kingo root from this link. Lunch the kingoroot please
do connect the laptop to internet before launching (ie. Here should be the
kingoroot so that it can download its drivers, it doesn't take much data say
20mb you will be done. Wait for the installation to complete. Then connect your
Android phone via USB (ensure you have enabled usb debugging to do this SETTING
> DEVELOPERS OPTION> thick enable usb debugging) click "ROOT"
on the kingoroot, wait for the operation to complete then you see success
Note: its illegal to change the
IMEI of your device in some countries and its void the warranty that may come
with the android device but when you do a factory reset it returns it back to
the way it was. You can try changing the IMEI if it will be successfully before
going to root the device

 2. Get the IMEI generator (please read the
installation note before proceeding) after successfulinstallation click on get
imei and continue to get your new Blackberry IMEI. (if you were unable to generate IMEI use any of these i generated 358265010719380 358265016759133 358265010779830 358265018769635 358265013719361) write down the Imei number then you need to access the Engineer Mode of your
Android device, to do this just dial any of these codes with your device
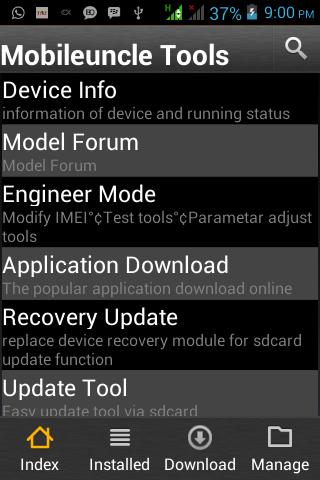
*#*#3646633#*#* or *#7465625# If none of the codes works for your device, then
download Android MobileUncle app here and install it on your device to access
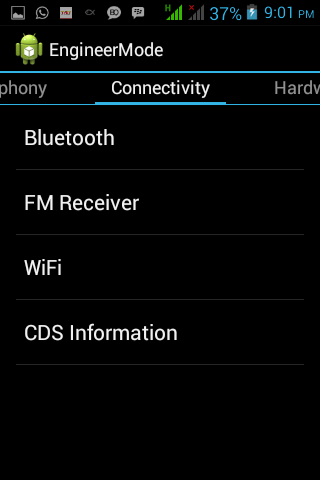
the Engineer Mode .navigate to the second menu option Connectivity by the right
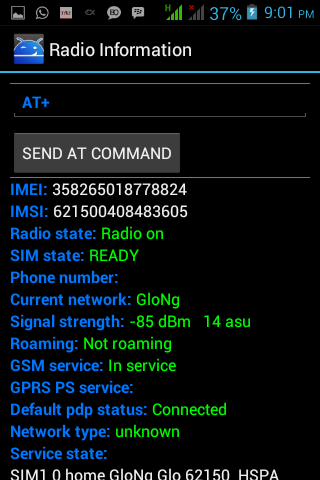
On the Connectivity options, go down and choose CDS Information, Radio Information,
Phone2 and you should now see the “ AT+ ” command line without the quotation.
Note here that the Phone2 you chose above signifies that you are changing the
IMEI of your SIM2 Now just add this command EGMR=1,10,”Your 15 digit BB IMEI”
to the AT+ line to have something like this AT +EGMR=1,10,”357490978658998” and
then press the SEND AT COMMAND button. You will now get a successful command
sent message, just press done and reboot your phone, then use *#06# to confirm
that your IMEI has changed
Note from the command line above, if you press the SEND AT
COMMAND button after inputting on the command line as indicated and you get an
error message, then rewrite the command line with a space in between AT and
+EGMR i.e. AT (space) +EGMR=1,10,”Your 15 digit BB IMEI” so it will now look
like this AT +EGMR=1,10,”Your 15 digit BB IMEI” and always remember to include
the double opening and closing quotations on the IMEI part of the command line
only as indicated. Again as mentioned above, it was the Phone2(SIM2) IMEI that
was changed, so if you want to change the IMEI of your SIM1, when you get to
the Radio Information as prescribed above, instead of choosing the Phone2 option,
now choose the Phone1 and the AT+ command line should now be AT +EGMR=1,7”Your
15 digit BB IMEI” against AT +EGMR=1,10,”Your 15 digit BB IMEI” which was for Phone2(SIM2).
Complete the process like before.
Thanks for sharing this helpful information.
ReplyDelete